
comment
Last week I had a Community for F# talk on WebSharper where I presented a small WebSharper application to implement a client-based, persistent shopping cart, and I received numerous emails asking for the source code for that talk. So in this post I am going to show you the full source code and walk you through what I did to implement the shopping cart functionality. The code provided here should work on any existing 1.0.X installation, preferably on the latest 1.0.28 release.
What's so special about this implementation?
- First of all, it's all done with F# code with minimal markup involved to implement a site master page.
- It demonstrates how easily you can write entire web applications in F# and integrate seamlessly with ASP.NET.
- Despite its shortness, this shopping cart implementation can handle multiple product categories and display various products under in each category.
- It is implemented entirely in client-side code, except for the initial call to the server to fetch the available products and families. Therefore, adding to, or removing items from the shopping cart, and calculating the total sum is handled entirely on the client, without any server-side intervention. This makes the application fast and highly interactive.
- The application demonstrates just how easily you can enlist external JavaScript libraries in your WebSharper applications, all with F# code.
Building a shopping cart - the parts needed
There are three main parts to this WebSharper application. First, you need a design for how the page should look, second you need a WebSharper binding for the chosen client-side persistency framework, and third you need the WebSharper code for the main functionality of the shopping cart. We will discuss each of these below.
To get started, you should create a new WebSharper application in Visual Studio. If you don't have WebSharper installed, you can search for the WebSharper Standard plugin in the Visual Studio Gallery (in Visual Studio 2010, go to Tools / Extension Manager, and search for WebSharper in the Online Gallery), or download WebSharper Standard from our web site directly.
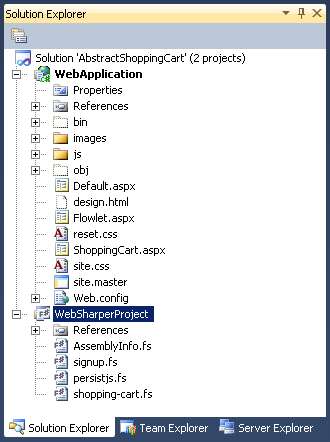
The following screenshot shows how your solution will eventually look like in the Visual Studio Solution Explorer.
Step 1 - Getting the design done
With WebSharper Standard, the primary way to expose your WebSharper applications is via ASP.NET. You will see shortly how easily you can accomplish this. In this first step, however, you will create a basic master page and populate the web application project in your WebSharper solution with a couple pages.
First, note that I am showing an out-of-project design.html file in the WebApplication project. This I used to create a basic HTML layout page that will serve as my ASP.NET master page. I then took this design and transliterated it to the following master page:
1
2
3
4
5
6
7
8
9
10
11
12
13
14
15
16
17
18
19
20
21
22
23
24
25
26
27
28
29
30
31
32
33
34
35
36
37
38
39
40
41
42
43
44
45
46
47
48
49
50
51
52
53
<%@ Master %> <html xmlns="http://www.w3.org/1999/xhtml"> <!-- Head --> <head id="Head1" runat="server"> <title>Your site title</title> <link href="reset.css" rel="stylesheet" type="text/css" /> <link href="site.css" rel="stylesheet" type="text/css" /> <WebSharper:ScriptManager runat="server" ></WebSharper:ScriptManager> </head> <body> <form runat="server"> <table> <tbody> <tr> <td colspan="2" id="menu"> <div> <asp:HyperLink runat="server" NavigateUrl="~/Flowlet.aspx"> Flowlet</asp:HyperLink> | <asp:HyperLink runat="server" NavigateUrl="~/ShoppingCart.aspx"> Shopping Cart</asp:HyperLink> </div> </td> </tr> <tr> <td colspan="2" id="banner"> <asp:ContentPlaceHolder runat="server" ID="Title"> </asp:ContentPlaceHolder> </td> </tr> <tr> <td id="main"> <asp:ContentPlaceHolder runat="server" ID="Main"> </asp:ContentPlaceHolder> </td> <td id="side"> <asp:ContentPlaceHolder runat="server" ID="Side"> </asp:ContentPlaceHolder> </td> </tr> <tr> <td colspan="2" id="footer"> WebSharper™ demo by Adam Granicz, IntelliFactory. Absolutely no warranty of any kind :) </td> </tr> </tbody> </table> </form> </body> </html>
I won't inline reset.css and site.css here, you can find them in the attachment zip file in the bottom of this article. As you would expect, the former implements some basic "reset" on the HTML styles, and the latter implements the look and feel for the mini-site.
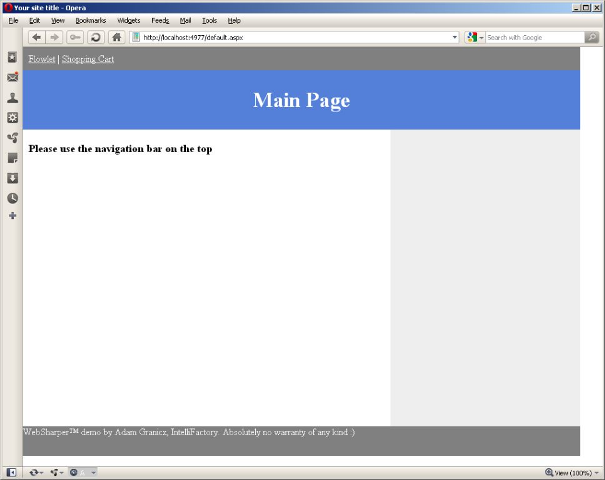
The master page with a default instantiation looks like the following:
With this new master page, you can add a couple new pages and modify the default page to have links to both. Here is Flowlet.aspx - which wraps the SignupSequence pagelet (renamed to signup.fs in WebSharperProject) from the "default" WebSharper project that I left for the sake of having two different pages in our mini site:
1
2
3
4
5
6
7
8
9
<%@ Page MasterPageFile="~/site.master" %>

<asp:Content ContentPlaceHolderID="Title" runat="server">
    <h1>Flowlets Demo</h1>
</asp:Content>

<asp:Content ContentPlaceHolderID="Main" runat="server">
    <ws:SignupSequence runat="server" ></ws:SignupSequence>
</asp:Content>
Note that I did have to make a couple small changes in signup.fs from the default, namely I switched the formlet and flowlet declarations to be lazy, so I have:
1
2
3
4
5
6
7
8
9
10
11
12
13
14
[<JavaScript>]
let BasicInfoForm () : Formlet<BasicInfo> =
    ...

[<JavaScript>]
let ContactInfoForm () =
    ...

[<JavaScript>]
let SignupSequence () =
    ...

[<JavaScript>]
override this.Body = ContactForms.SignupSequence ()
These were necessary because the code in the default project template assumes that these formlets are created eagerly - that is for every pagelet inside your WebSharper application. However, in our shopping cart application this is not true - so you need to switch those formlet/flowlet constructions to be on demand.
The ShoppingCart.aspx file is just as simple as Flowlet.aspx, simply filling the content holes of the master page and exposing the two WebSharper controls (ItemsToBuy and ShoppingCart) we are about to develop.
1
2
3
4
5
6
7
8
9
10
11
12
13
<%@ Page MasterPageFile="~/site.master" %>

<asp:Content ContentPlaceHolderID="Title" runat="server">
    <h1>Your Shopping Cart</h1>
</asp:Content>

<asp:Content ContentPlaceHolderID="Main" runat="server">
    <ws:ItemsToBuy ID="ItemsToBuy1" runat="server" ></ws:ItemsToBuy>
</asp:Content>

<asp:Content ContentPlaceHolderID="Side" runat="server">
    <ws:ShoppingCart ID="ShoppingCart1" runat="server" ></ws:ShoppingCart>
</asp:Content>
Step II - Wrapping Persist.js
Before we develop the shopping cart functionality, we need an API for saving to and retrieving values from a client-side persistent storage. This machinery will give us the necessary functions to operate on the shopping cart state.
A quick look around the web for client-side persistent storage reveals several compeling choices. For one, we could use HTML5 Web Storage - however, its implementation is lagging behind in different browsers. Another alternative, PersistJs seems much more viable as it promises widespread backwards compatibility, so I decided to use that.
A quick look at the PersistJs samples reveals a very simple, to-the-point API. You can do three main things:
- Create or fetch a new store by name
- Save some string data at a given string key in a store.
- Retrieve asynchronously the value assigned to some key in a store.
We will need to store arbitrary values in the store, so this API needs some slight adjustments as we migrate it over to WebSharper. For this, we need a way to marshal arbitrary values to strings and unmarshal them back to values of their appropriate type.
Below is the full implementation of the PersistJs WebSharper bindings (WebSharperProject/persistjs.fs):
1
2
3
4
5
6
7
8
9
10
11
12
13
14
15
16
17
18
19
20
21
22
23
24
25
26
27
28
29
30
31
32
33
34
35
36
37
38
39
40
41
42
43
44
45
46
47
48
49
50
51
52
53
54
55
56
57
58
59
60
61
62
63
64
65
namespace IntelliFactory.WebSharper.PersistJs

open IntelliFactory.WebSharper

module internal JSON =

    [<Inline "JSON.parse($x)">]
    let Parse<'T> (x: string) : 'T = Unchecked.defaultof<'T>

module Dependencies =
    open System
    open System.Configuration
    open IntelliFactory.WebSharper

    let internal PersistJsBase =
        let key = "IntelliFactory.WebSharper.PersistJs"
        match ConfigurationManager.AppSettings.[key] with
        | null ->
            "/js/persist-js"
        | url ->
            url

    [<AbstractClass>]
    type JsResource(fname: string) =
        interface IResource with
            member this.Render (resolver, writer) =
                let loc = sprintf "%s/%s" PersistJsBase fname
                Resource.RenderJavaScript loc writer

    type PersistJs() = inherit JsResource("persist-min.js")

[<Require(typeof<Dependencies.PersistJs>)>]
[<JavaScriptType>]
type Store =
    [<Inline "new Persist.Store($name)">]
    static member Create (name: string) : Store =
        failwith "Client-side"

    [<Inline "$this.set($key, JSON.stringify($value))">]
    member this.Save<'T> (key: string, value: 'T) : unit =
        failwith "Client-side"

    [<Inline "$this.get($key, $callback)">]
    member private this.RetrieveP (key: string, callback: bool*string->unit) : unit =
        failwith "Client-side"

    [<JavaScript>]
    [<Inline>]
    member this.Retrieve<'T> (key: string) : Async<'T option> =
        Async.FromContinuations <| fun (onOk, onExc, onTerm) ->
            this.RetrieveP(key, fun (ok, str) ->
                if ok && str <> null then
                    onOk (Some (JSON.Parse<'T> str))
                else
                    onOk None)

    [<JavaScript>]
    [<Inline>]
    member this.Contains (key: string) : Async<bool> =
        Async.FromContinuations <| fun (onOk, onExc, onTerm) ->
            this.RetrieveP(key, fun (ok, str) ->
                if ok && str <> null then
                    onOk true
                else
                    onOk false)
In this code, the internal JSON module supplies the Parse member, this performs the unmarshalling needed for retrieving values from the store. Marshalling is inlined via the native JSON.stringify function.
While the above code is pretty straightforward, the Dependencies module deserves some mention. First, we define an abstract class that represents JavaScript resources relative to a base location. This base location defaults to the /js/persist-js folder on the web server, but can also be overriden via Web.Config. Finally, we define the persist-min.js (available from the PersistJs site) artifact as a JavaScript resource. Note how this resource is then annotated on the main Store type as a resource requirement. This causes the WebSharper script manager (that is present in our master page) to inline a reference to persist-min.js when this Store class is in use in the current page.
Part 3 - Implementing the shopping cart
Now you are ready to implement the main shopping cart functionality. This has two parts- a listing of available products broken down by category, and the shopping cart that summarizes the items already in the cart.
Below is a mockup of these two "controls" and the events that can originate from both.
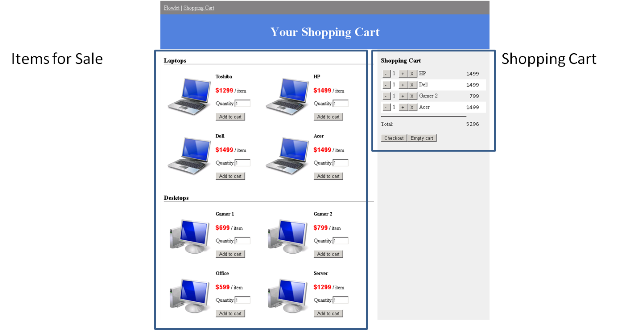

Note that both the ItemsForSale and the ShoppingCart controls can originate events, but only the latter one can react to them visually. You can implement these events in a variety of ways. In my talk I mentioned several alternatives:
- Implementing a simple message queue, such as a MailBox
- Hosting ItemsToBuy and ShoppingCart in a parent pagelet and handling their communication locally in that pagelet
- Using the upcoming RxJs bindings for WebSharper, and implementing the shopping cart as an observable collection via reactive programming
- Using simple F# events - where both controls trigger various events, and the ShoppingCart control subscribes to the shared event channel and responds visually as appropriate
For this implementation I chose the last option, implementing the communication between the two pagelets using F# events. This is a strikingly simple yet effective approach that works perfectly on the client-side.
So without further due, let's jump into the main shopping-cart.fs module:
1
2
3
4
5
6
7
8
9
10
11
12
13
14
15
16
17
18
19
20
21
22
23
24
25
26
27
28
29
30
31
32
33
34
35
36
37
38
39
40
41
42
43
44
45
46
47
48
49
50
51
52
53
namespace WebSharperProject

open System
open IntelliFactory.WebSharper
open IntelliFactory.WebSharper.Html

module ShoppingCartInternals =
    module M = Microsoft.FSharp.Collections.Map

    module Internals =

        [<JavaScript>]
        let internal store () = PersistJs.Store.Create "shopping-cart-4"

        [<JavaScript>]
        let NextCounter () =
            let setCounterTo i =
                (store ()).Save<int>("counter", i)
            async {
                let! currOpt = (store ()).Retrieve<int> "counter"
                let current =
                    match currOpt with
                    | None ->
                        0
                    | Some curr ->
                        curr
                let res = current+1
                setCounterTo res
                return res
            }

        [<JavaScript>]
        let SetItemsInCart items =
            (store ()).Save<(string * (string*float*int*int)) array>("cart", items)

        [<JavaScript>]
        let GetItemsInCart () : Async<Map<string, (string*float*int*int)>> =
            let getCart () =
                (store ()).Retrieve<(string * (string*float*int*int)) array> "cart"
            async {
                let! res = getCart ()
                let newres =
                    match res with
                    | None ->
                        SetItemsInCart [||]
                        [||]
                    | Some items ->
                        items
                let res =
                    newres
                    |> M.ofArray
                return res
            }
The above code encapsulates the persistent storage-related functionality into the Internals module. Here, the internal store function creates or fetches a store by name, NextCounter supplies an increasing stream of numbers (implemented via storing the last "ticket" number in the persistent store) that you use for ordering items that are added to the cart (last added is shown last), SetItemsInCart, and GetItemsInCart store and retrieve all items in the cart, respectively (we do this as a batch operation since our PersistJs binding doesn't expose an API for enumerating all entries in a given store).
The events you saw earlier are modeled as a union type (CartEvent) and the main event channel (ShoppingCartEvents) is a simple F# first-class event that communicates CartEvent values:
1
2
3
4
5
6
7
8
9
10
11
12
13
14
15
    module Events =
        type Item =
            { ProductName : string
              Title: string
              Price: float }

        type CartEvent =
            | AddItem of Item * int
            | AddOneItem of string
            | RemoveOneItem of string
            | RemoveItem of string
            | EmptyCart

        [<JavaScript>]
        let ShoppingCartEvents = new Event<CartEvent> ()
The only time we need to contact the server is when we fetch the available products and their categories. This is encapsulated in the Server module:
1
2
3
4
5
6
7
8
9
10
11
12
13
14
15
16
17
18
19
20
21
22
23
24
25
26
27
28
29
30
31
32
33
34
35
36
37
38
39
40
41
    module Server =
        type CartFamily =
            { Title : string
              Products : CartProduct list }

        and CartProduct =
            { Title : string
              ProductName : string
              ImageSrc : string
              Price : float }

        /// Computes the families and the products inside them that are
        /// available for download.
        [<Rpc>]
        let ComputeFamiliesAndProducts () : CartFamily list =
            let T imageSrc (title, id, price) =
                { Title = title
                  ProductName = id
                  ImageSrc = imageSrc
                  Price = price }
            let laptop prod = T "/images/laptop.png" prod
            let desktop prod = T "/images/desktop.png" prod
            let netbook prod = T "/images/netbook.png" prod
            [ { Title = "Laptops"
                Products =
                  [ laptop ("Toshiba", "id1", 1299.0)
                    laptop ("HP", "id2", 1499.0)
                    laptop ("Dell", "id3", 1499.0)
                    laptop ("Acer", "id4", 1499.0) ] }
              { Title = "Desktops"
                Products =
                  [ desktop ("Gamer 1", "id11", 699.0)
                    desktop ("Gamer 2", "id12", 799.0)
                    desktop ("Office", "id13", 599.0)
                    desktop ("Server", "id14", 1299.0) ] }
              { Title = "Netbooks"
                Products =
                  [ netbook ("Entry", "id21", 799.0)
                    netbook ("Medium", "id22", 899.0)
                    netbook ("Cool", "id23", 699.0)
                    netbook ("Speed-King", "id24", 999.0) ] } ]
Here, each product has a title that we display (such as "Dell"), a corresponding product name we use to identify the product (such as "id3"), a URL that points to the image that represents the product, and a price (we assume dollars).
You will also need a tiny utility function to create buttons:
1
2
3
4
5
    module WebControls =

        [<JavaScript>]
        let Button label =
            Input [Type "button"; Value label; Width (label.Length*15 |> string)]
With the internal, event-, and server-relared abstractions, you can now implement the actual client-side controls. The "design" for these controls is taken from our initial HTML mockup (design.html), transliterated into a nested HTML combinator structure with further F# code to populate it with actual data. The Client module has the function that is called when the user checks out - I left this function empty, but this is the place where you would normally process payment, etc.
1
2
3
4
5
    module Client =
        /// Sends payment.
        [<JavaScript>]
        let SendPayment (items: (string * (string*float*int*int)) list) =
            ()
The ItemsForSale control fetches all product families from the server and displays them.
1
2
3
4
5
6
7
8
9
        /// Displays all item categories and their items for sale.
        [<JavaScript>]
        let ItemsToBuy () =
            let families = Server.ComputeFamiliesAndProducts ()
            Div [Id "shopping-cart"] -< [
                families
                |> List.map (fun family ->
                    Div [Class "family"] -< [
                        H1 [Text family.Title]
For each family, you list all products therein by iterating through the Products collection:
1
2
3
4
5
6
7
8
9
10
11
12
13
14
15
16
17
                        family.Products
                        |> List.map (fun product ->
                            let input = Input [Type "text"; Value "1"]
                            Div [Class "product"] -< [
                                Img [Alt product.Title; Src product.ImageSrc]
                                Div [
                                    H1 [Text product.Title]
                                    P [
                                        Code [Text ("$" + string product.Price)]
                                    ] -< [
                                        Text " / item"
                                    ]
                                    P [
                                        Text "Quantity:"
                                    ] -< [
                                        input
                                    ]
The "Add to cart" button triggers a CartEvent.AddItem event that carries the product data:
1
2
3
4
5
6
7
8
9
10
11
12
                                    WebControls.Button "Add to cart"
                                    |>! OnClick (fun e args ->
                                        Events.CartEvent.AddItem (
                                            { ProductName=product.ProductName
                                              Title=product.Title
                                              Price=product.Price },
                                            (int input.Value))
                                        |> Events.ShoppingCartEvents.Trigger
                                    )
                                ]
                            ]
                        )
Finally, you add a "closer" DIV to render each family nicely under one another.
1
2
3
4
5
6
7
8
9
                        |> fun products ->
                            products @ [
                                Div [Style "clear:both;"]
                            ]
                            |> Div
                    ]
                )
                |> Div
            ]
The ShoppingCart control is slightly more complex as it needs to handle the various events that come through the ShoppingCartEvents channel. But first, you define a placeholder for the shopping cart (contents), and a function that updates this placeholder with the items in the cart:
1
2
3
4
5
6
7
8
9
10
        /// Displays the shopping cart.
        [<JavaScript>]
        let ShoppingCart () =
            let contents = Div []
            let updateCart () =
                async {
                    let! itemsInCart = Internals.GetItemsInCart ()
                    contents.Clear ()
                    Div [Id "shopping-cart-contents"] -< [
                        H1 [Text "Shopping Cart"]
Each item in the cart will be displays as a row in a table. Furthermore, cart items are sorted by their order. You also need to the total cost of all items in the cart, so you fold through the sorted item list, with some minor logic to alternate row styles:
1
2
3
4
5
6
7
8
9
10
                        Table [
                            itemsInCart
                            |> M.toList
                            |> List.sortBy (fun (_, (_, _, _, order)) -> order)
                            |> List.fold (fun (i, acc, sum) (product, (t, p, q, o)) ->
                                let alt =
                                    if i%2 = 1 then
                                        "alt "
                                    else
                                        ""
For each item, you display a set of buttons, each firing their corresponding events, and accumulate the total cost:
1
2
3
4
5
6
7
8
9
10
11
12
13
14
15
16
17
18
19
20
21
22
23
24
25
26
27
28
29
30
31
32
33
34
35
36
                                (i+1, acc @
                                 [
                                    TR [Class alt] -< [
                                        TD [Class "col1"] -< [
                                            WebControls.Button "-"
                                            // What happens when we click "-"?
                                            |>! OnClick (fun e args ->
                                                product
                                                |> Events.CartEvent.RemoveOneItem
                                                |> Events.ShoppingCartEvents.Trigger
                                            )
                                            Div [Class "count"] -< [q|>string|>Text]
                                            WebControls.Button "+"
                                            // What happens when we click "+"?
                                            |>! OnClick (fun e args ->
                                                product
                                                |> Events.CartEvent.AddOneItem
                                                |> Events.ShoppingCartEvents.Trigger
                                            )
                                            WebControls.Button "X"
                                            // What happens when we click "Remove"?
                                            |>! OnClick (fun e args ->
                                                product
                                                |> Events.CartEvent.RemoveItem
                                                |> Events.ShoppingCartEvents.Trigger
                                            )
                                            Div [Class "title"] -< [Text t]
                                        ]
                                        TD [Class "col2"] -< [
                                            Code [
                                                Text (string p)
                                            ]
                                        ]
                                    ]
                                 ], sum + (float q)*p)
                            ) (0, [], 0.)
Finally, you wrap up the items with displaying the totals:
1
2
3
4
5
6
7
8
9
10
11
12
                            |> fun (_, rows, sum) ->
                                rows
                                |> fun rows ->
                                    rows @ [
                                        TR [ Hr [] ]
                                        TR [
                                            TD [Text "Total:"]
                                            TD [Code [sum |> string |> Text]]
                                        ]
                                    ]
                                    |> TBody
                        ]
And last, you add the "Checkout" and "Empty cart" buttons - both clearing the cart contents.
1
2
3
4
5
6
7
8
9
10
11
12
13
14
15
16
17
18
19
20
21
22
23
                        Div [Style "height:20px"] -< []
                        Div [
                            WebControls.Button "Checkout"
                            |>! OnClick (fun e args ->
                                Window.Alert "Checkout!"
                                // Process payment
                                itemsInCart
                                |> M.toList
                                |> SendPayment
                                // Empty shopping cart
                                Events.CartEvent.EmptyCart
                                |> Events.ShoppingCartEvents.Trigger
                            )
                            WebControls.Button "Empty cart"
                            |>! OnClick (fun e args ->
                                Events.CartEvent.EmptyCart
                                |> Events.ShoppingCartEvents.Trigger
                            )
                        ]
                    ]
                    |> contents.Append
                }
                |> Async.Start
Handling the events that come through the event channel is done by subscribing to that event channel, matching on the various events that come in and do the right thing for each:
1
2
3
4
5
6
7
8
9
10
11
12
13
14
15
16
17
18
19
20
21
22
23
24
25
26
27
28
29
30
31
32
33
34
35
36
37
38
39
40
41
42
43
44
45
            Events.ShoppingCartEvents.Publish.Add (fun ce ->
                async {
                    let! itemsInCart = Internals.GetItemsInCart ()
                    let! next = Internals.NextCounter ()
                    let SET items =
                        items |> M.toArray |> Internals.SetItemsInCart
                    let _ =
                        match ce with
                        | Events.CartEvent.AddItem (item, qty) ->
                            let qN, o =
                                if M.containsKey item.ProductName itemsInCart then
                                    let _, _, qO, o = itemsInCart.[item.ProductName]
                                    qO + qty, o
                                else
                                    qty, next
                            itemsInCart
                            |> M.add item.ProductName (item.Title, item.Price, qN, o)
                            |> SET
                        | Events.CartEvent.RemoveOneItem productName ->
                            if M.containsKey productName itemsInCart then
                                let t, p, q, o = itemsInCart.[productName]
                                if q <= 1 then
                                    itemsInCart
                                    |> M.remove productName
                                else
                                    itemsInCart
                                    |> M.add productName (t, p, q-1, o)
                                |> SET
                        | Events.CartEvent.AddOneItem productName ->
                            if M.containsKey productName itemsInCart then
                                let t, p, q, o = itemsInCart.[productName]
                                itemsInCart
                                |> M.add productName (t, p, q+1, o)
                                |> SET
                        | Events.CartEvent.RemoveItem productName ->
                            itemsInCart
                            |> M.remove productName
                            |> SET
                        | Events.CartEvent.EmptyCart ->
                            M.empty
                            |> SET
                    do updateCart ()
                }
                |> Async.Start
            )
And finally, you display the cart contents and return the placeholder element:
1
2
            updateCart ()
            contents
Conclusion
In this tutorial, you saw how you can bind and use existing JavaScript libraries with WebSharper and implemented a client-based persistent shopping cart based on PersistJs. You used asynchronous workflows to model fetching values from the persistent store, and F# events for modeling the communication between two pagelets that made up your shopping cart application.
 See all tags